Custom Embroidery Digitizing: A Journey from Beginner to Expert
Custom Embroidery Digitizing is a fascinating and creative craft that allows individuals to turn their designs into beautifully embroidered creations. Whether you are a beginner looking to learn the basics or an expert seeking to enhance your skills, this guide will take you through the journey of Custom Embroidery Digitizing step by step.
Understanding Custom Embroidery Digitizing
At its center, Custom Embroidery Digitizing is the transformative preparation of changing over any realistic or printed plan into a fastened record that an embroidery machine can decipher and execute. This digital interpretation includes mapping out each stitch’s way, sort, and color, guaranteeing the embroidery machine can precisely reproduce the intended design on the fabric. It’s an exact operation that requires understanding both the creative components of the initial design and the specialized capabilities of the embroidery apparatus. The digitized record acts as a diagram for the machine, directing it on where to put fastens, alter string colors, and execute diverse fasten designs to bring the plan to life in a thread frame. The dominance of this preparation opens up unending conceivable outcomes for customizing attire, accessories, and domestic stylistic layout with one-of-a-kind weaved plans.
Selecting the Right Tools and Software
Setting out on the way of Custom Embroidery Digitizing requests the choice of well-suited instruments and computer programs, significant for creating exact designs. The foundation of your digitizing setup is a high-quality embroidery digitizing program, with industry favorites counting Wilcom, Beat, and Bring Forth Embroidery standing out for their vigorous highlights and user-friendly interfacing. These programs offer a suite of tools for altering, planning, and previewing your digitized embroidery, guaranteeing that your imaginative vision is impeccably deciphered into stitch-ready records. Nearby selecting the correct computer program, and ensuring your computer is prepared to handle the requests of the program is pivotal. Explore a framework with satisfactory processing control and memory to bolster the smooth operation of your digitizing computer program, avoiding slack and guaranteeing productivity in your plan process. This foundation will set the arrangements for your victory in Custom Embroidery Digitizing, allowing you to center on unleashing your inventiveness and acing the art of weaving plan.
Preparing Your Design for Digitizing
To start the digitization process, choose an image or artwork of high quality, ideally with distinct, clean lines and well-defined areas to facilitate a smooth transition into stitches. Using your digitizing software, make any necessary adjustments to the artwork to optimize it for the embroidery process. This might include altering contrast, simplifying complex areas, or segmenting the design into different color sections. This preparation phase is critical as it ensures your design is in the best possible state before beginning the detailed work of converting it into an embroidery pattern, setting the stage for a successful digitization outcome.
The Digitizing Process Explained Step-by-Step
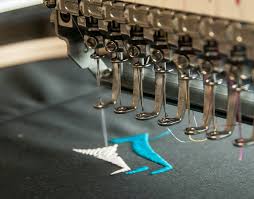
Begin by opening your digitizing software and importing your prepared design file. Analyze the design to determine the sequence of stitching, starting from the bottom layer up to the topmost details. Choose the appropriate stitch types for different elements—such as satin for borders and fill stitches for larger areas. Carefully set the stitch density and direction to ensure the final embroidery presents the desired look and texture. Utilize the software’s tools to trace over your design, creating paths for each stitch line. This meticulous step transforms your static image into a dynamic embroidery pattern, guiding the machine’s needles along the designated paths. Next, assign color stops according to your design’s color scheme, ensuring a smooth transition between thread changes. Lastly, review your digitized design in preview mode, adjusting any elements as needed to refine the stitch paths and guarantee a quality output when embroidered.
Testing and Adjusting Your Digitized Design
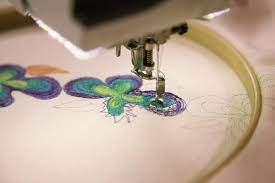
After completing the digitization of your design, conducting a test run is an essential next step. This involves embroidering the design on a piece of scrap fabric, which serves as a preliminary canvas to identify any potential errors or adjustments needed. During this phase, look out for misaligned stitches or discrepancies in the design’s appearance versus its digital preview. If the embroidery doesn’t meet your expectations, return to the digitizing software to make the necessary tweaks. Adjustments might include refining stitch paths, modifying stitch density, or altering the sequence of color changes. This iterative process of testing and adjusting ensures that the final embroidery accurately reflects your original design vision. Engaging in this meticulous review and refinement phase is crucial for achieving high-quality embroidered outcomes, ultimately enhancing the overall aesthetic and integrity of your design.
Advancing Your Skills in Custom Embroidery Digitizing
To elevate your make in Custom Embroidery Digitizing, drench yourself within the exploration of more advanced designs and acing advanced techniques. Dig into the art of controlling stitch sorts and densities to realize special surfaces and impacts that can set your work separated. Seek out learning openings through workshops and online instructional exercises advertised by prepared digitizers, where you’ll be able to reveal priceless experiences and strategies not promptly clear in essential guides. Continuously challenge yourself with unused projects that thrust the boundaries of your current expertise set. This proactive approach to learning and experimentation is key to advancing as a gifted digitizer, competent in bringing indeed the foremost perplexing designs to life with accuracy and imagination.
Conclusion
Embarking on the journey of custom embroidery digitizing transforms ideas into tangible embroidered art. This guide has navigated you through the foundational steps and beyond, offering insights into both the technical and creative aspects of digitization. As you continue to refine your skills, remember the importance of patience, persistence, and the willingness to explore new challenges. With each project, you’ll discover more about the nuances of digitizing and embroidery, further enhancing your capabilities. Cultivating your craft in this field is an ongoing process, fueled by your enthusiasm and dedication to pushing the boundaries of what you can create. Keep experimenting, learning from each success and setback, and take pride in the progress you make as you advance in the art of custom embroidery digitizing.


Leave a reply


-
Understanding Its Role in US Visa Processes and Renewal Procedures
Embarking on a journey to the United States involves navigating various aspects ... -
-
-